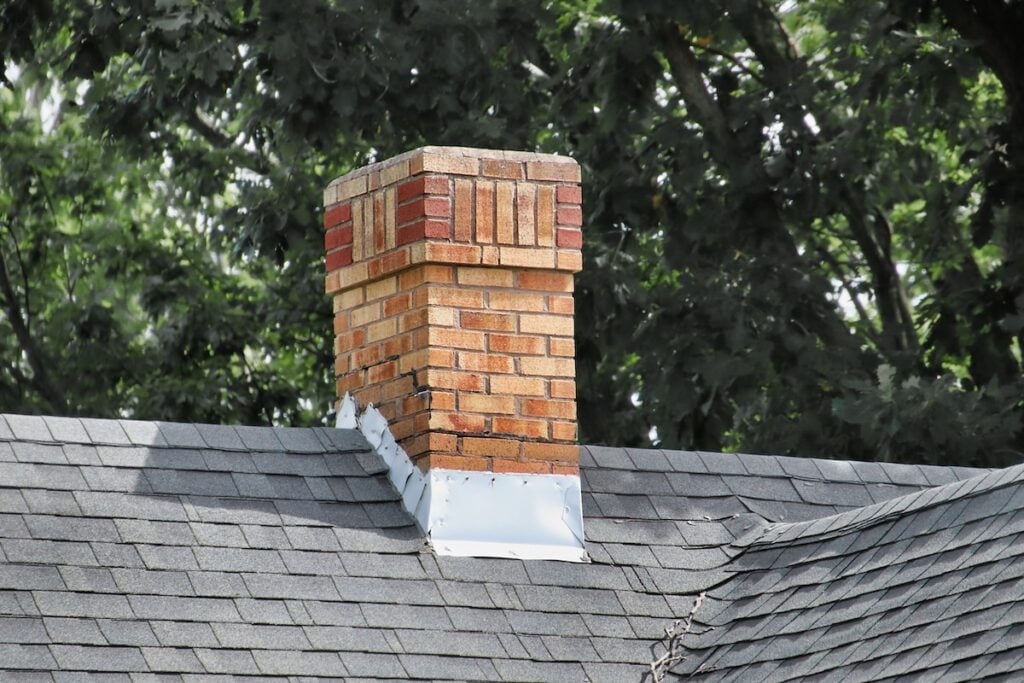
Chimney Flashing Repair: 10 Step Guide To Fix Flashing

Written By: First American Roofing
07/03/24
6 Mins
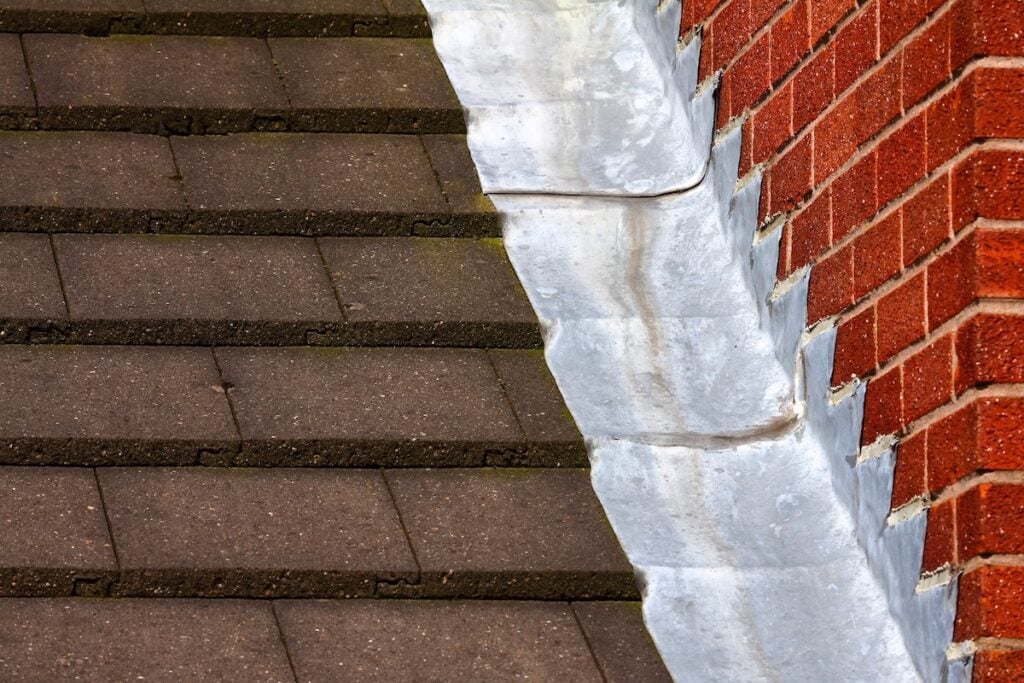
Chimneys add warmth, charm, and functionality to a home, but they also require regular care to stay in top shape. One of the most important maintenance tasks is chimney flashing repair. Flashing is the protective metal barrier that seals the joint between your chimney and roof, preventing water from sneaking into your home. When flashing becomes loose, rusted, or cracked, leaks and structural damage can quickly follow, which is why knowing how to repair or replace it is essential for homeowners in Wisconsin and Minnesota.
- Prevent water leaks: flashing directs water away from vulnerable areas near your chimney.
- Maintain curb appeal: a well-kept chimney adds beauty and character to your home.
- Increase property value: functional chimneys are a selling point for prospective buyers.
⭐️ Benefits Of Having A Chimney
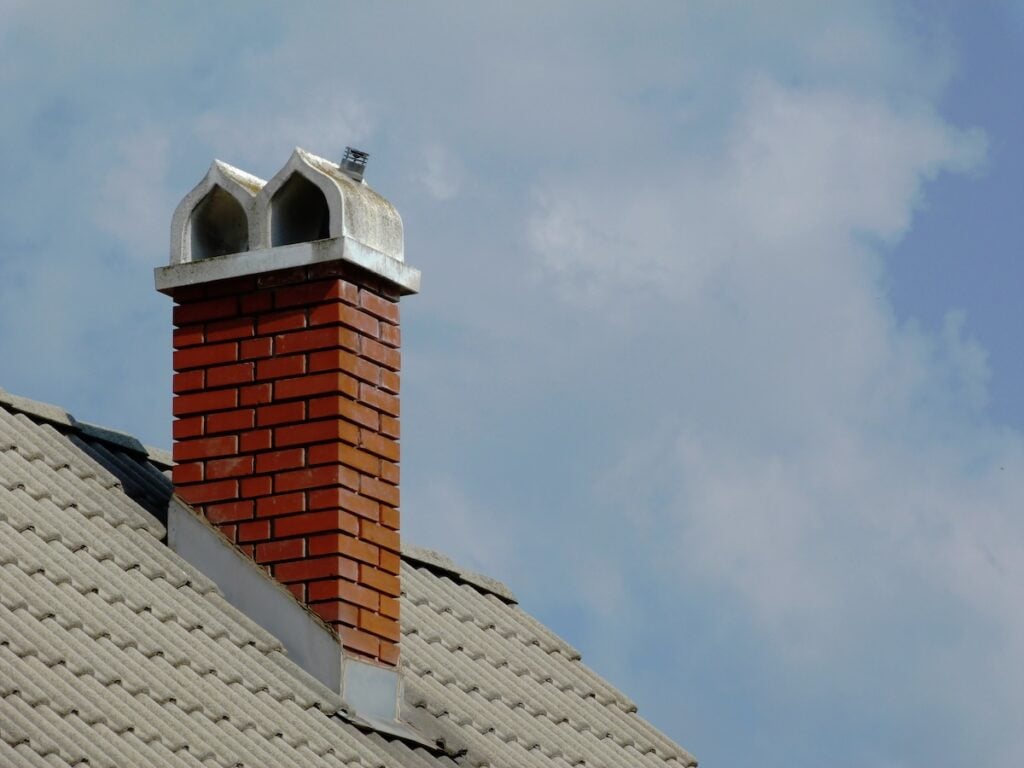
Chimneys are more than just a practical feature, they enhance your home in several ways. For homeowners in La Crescent and surrounding areas, where cozy winters are part of life, chimneys offer both comfort and charm.
Why Chimneys Stand Out
- Enhanced aesthetics: a well-designed chimney adds architectural detail and timeless appeal.
- Energy efficiency: fireplaces supported by chimneys can reduce heating costs in colder months.
- Higher property value: buyers often view chimneys as a premium feature.
- Ambiance and comfort: a fireplace creates a warm, welcoming space for family and friends.
🛠️ Tools And Materials For Chimney Flashing Repair
Before starting any repair project, having the right tools and materials ensures a smoother process.
- Sheet metal: used for creating or replacing flashing sections.
- Roofing cement: secures new flashing in place with a waterproof seal.
- Hammer and nails: essential for fastening flashing without damaging the roof.
- Utility knife: trims old flashing and shapes new metal pieces.
- Wire brush: scrubs the area clean before installation.
- Caulk gun and roof caulk: seal edges and joints against water infiltration.
- Measuring tape: ensures precise flashing cuts and fits.
- Ladder: provides safe access to your roof.
- Safety gear: gloves, goggles, and non-slip shoes protect against accidents.
- Chimney repair kit: optional but helpful for quick fixes on minor cracks.
✅ 10 Step Guide To Chimney Flashing Repair
Repairing flashing may sound overwhelming, but with patience and attention to detail, it is a manageable project.
Step 1: Inspect The Existing Flashing
Look for cracks, rust, or loose pieces around the chimney base. Identifying damage early helps you understand how much repair work is necessary.
Step 2: Remove Damaged Flashing
Cut away corroded or loose flashing with a utility knife. Take care not to disturb surrounding shingles or bricks. Cleaning out old roofing cement and debris leaves you with a solid surface to work on.
Step 3: Clean The Area
Use a wire brush to scrub away dirt, rust, and leftover cement. A clean surface allows new flashing to adhere tightly and prevents future leaks.
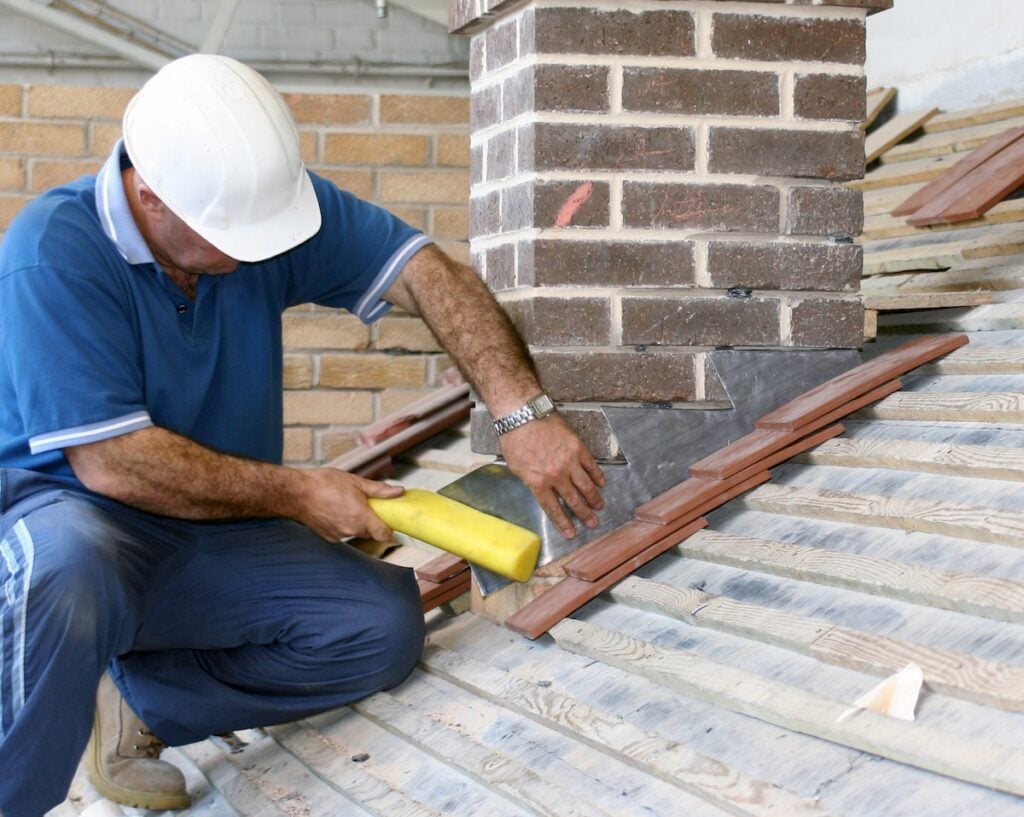
Step 4: Measure And Cut New Flashing
Measure the chimney’s dimensions carefully and cut sheet metal pieces to size. Slightly oversizing the flashing gives room for trimming, ensuring the tightest fit possible.
Step 5: Position The New Flashing
Place base flashing first, followed by step flashing up the chimney’s sides, and finally counter flashing along the top. Overlapping sections correctly is crucial for proper water flow.
Step 6: Secure The Flashing
Nail flashing into place carefully, driving nails only into edges to avoid creating unnecessary holes. Secure placement prevents movement during storms or high winds.
Step 7: Apply Roofing Cement
Apply roofing cement along seams and edges, smoothing it with a putty knife for a watertight seal. Allow it to dry without disturbance.
Step 8: Seal Joints With Roof Caulk
Use roof caulk to finish sealing joints, especially where flashing meets brick or valleys. This extra step guards against water intrusion in vulnerable spots.
Step 9: Perform A Final Inspection
Double-check that all seams are tight, flashing is flush, and cement or caulk has no gaps. Catching small errors now prevents future leaks.
Step 10: Clean Up And Monitor
Remove debris and excess material from the roof. Over the next few weeks, watch your chimney area after heavy rain to confirm the repair is watertight. Regular inspections every year or two will help you stay ahead of potential issues.
👉 Why Professional Repair May Be The Better Choice
While flashing repairs can be a DIY project, many homeowners prefer hiring professionals for peace of mind.
- Expert installation: contractors ensure proper placement and sealing.
- Safety: trained crews have the gear to work safely on steep or slippery roofs.
- Longer lifespan: professional repairs are more durable, reducing the need for repeat fixes.
- Early detection: roofers can spot other roofing concerns during the flashing repair.
| Factor | DIY Repair | Professional Repair |
| Cost | Lower upfront cost (materials only: $50–$150). | Higher cost ($300–$1,000 depending on damage). |
| Time | Can take several hours to a full day for beginners. | Usually completed in 1–3 hours by trained crews. |
| Skill required | Requires measuring, cutting, sealing, and roofing knowledge. | Contractors bring specialized experience and tools. |
| Durability | May last a few years if done carefully, but prone to errors. | Longer-lasting results with professional-grade materials. |
| Safety | Involves climbing ladders, handling sharp metal, and working at heights. | Safer — crews use proper harnesses, stabilizers, and training. |
| Warranty | No warranty; results depend on homeowner skill. | Many professionals back work with repair warranties. |
🏠 Chimney Care Tips For Wisconsin And Minnesota Homes
Maintaining your chimney isn’t just about repairs, it’s about proactive care. In regions like La Crescent, MN, where snowfall and ice are frequent, extra attention goes a long way.
- Annual inspections: schedule professional checks before winter to ensure your chimney is ready.
- Keep it clean: remove debris, leaves, and nests that may block airflow.
- Check mortar joints: inspect brick and mortar for cracks that could worsen with freeze-thaw cycles.
- Install a chimney cap: keeps water, snow, and wildlife out of the chimney.
💪 Protect Your Home With First American Roofing & Siding
A chimney is a beautiful and functional feature, but it requires proper care to stay safe and effective. Flashing is one of the most critical components, and repairing it correctly helps prevent leaks and structural damage. With the right tools and steps, homeowners can attempt DIY repairs, but professional help often ensures longer-lasting results.
At First American Roofing & Siding, Inc., we specialize in chimney flashing repairs and roof maintenance designed for Midwest weather conditions. If you live in La Crescent and the surrounding areas, and want to ensure your chimney and roof stay protected, our team is ready to help.
Contact us today to request a free estimate.